Showing posts with label extender. Show all posts

9/01/2012

Sling Media SlingLink Turbo Powerline Kit ( SL200-100 ) Review

Sling Media SlingLink Turbo Powerline Kit ( SL200-100 )
Average Reviews:

(More customer reviews)
In a large (brand new 5-bedroom, 3500 sq ft house) it works pretty well. NOTE: my specific objective was to support a SlingBox (original) with cable Internet elsewhere in the house.
I've used SlingBox and SlingLink Turbo in two different configurations:
1. SlingBox connected directly to my router; SlingLink supporting other wired + wireless computers elsewhere in the house via a wireless router.
2. SlingLink connected the Internet and SlingLink broadcasting to SlingLink supporting my SlingBox and XBOX 360 as "slave" devices.
The first configuration is better (obviously) because SlingBox can "broadcast" up to a full 2.5Mbps over a LAN connection. The second configuration is better for everyday use since I get maximum Internet bandwidth on computers.
Findings:
1. Internet speed test dropped from 18-19Mbps down / 2.5Mbps up (Comcast w/ SpeedBoost) to 2100Mbps down / 800Kbps up.
2. SlingBox over SlingLink drops to 1.2Mbps (video quality is a bit choppy vs. perfectly smooth otherwise). I've had it spike to 1.6Mbps over the LAN.
3. Additionally SlingBox over the open Internet (original intended use) maxes out at 600kbps, which is a hair below what it was without SlingLink in the middle.
4. The only real "issue" with SlingLink is probably due to home wiring (i.e. on a semi-related note I had to re-wire every cable jack and replace the primary splitter that my electrical contractor originally installed because the cheap original hardware was so bad that ).
5. Newer SlingBoxes (AV/PRO/SOLO) may be more tolerant of "spotty" Ethernet connections, considering they have newer H.264 compression chips.
All in all I'm happy. Wireline Ethernet isn't perfect and would probably work a lot better in a condominium or smaller house. A larger house would/could justify multiple cable modems.


Click Here to see more reviews about: Sling Media SlingLink Turbo Powerline Kit ( SL200-100 )

The SlingLink Turbo brings network connectivity to any electrical wall outlet, making it ideal for the modern living room with blisteringly fast speeds up to 85 Mbps. With four switched ports, it connects your Slingbox, game console, DVR, computer or anything with an Ethernet jack to your home network. Now you can run high-speed Internet through your existing electrical wiring with a simple plug-and-play connection. Plus, SlingLink Turbo is compatible with any home router.

Buy NowGet 18% OFF

Click here for more information about Sling Media SlingLink Turbo Powerline Kit ( SL200-100 )

Read More...

8/29/2012

Belkin F5D7132 Wireless-G Universal Range Extender Review

Belkin F5D7132 Wireless-G Universal Range Extender
Average Reviews:

(More customer reviews)
I have shared the same experience as the most helpful reviews here: this is a pain to install when you want to configure this Extender to be secure (so strangers can't mooch off of your internet or worse). On the other hand, once you have it set up, it works like a charm.
It's possible, but prepare to burn an hour or three. I would like to add some instructional steps, which are a variation of the very helpful ones already present here on Amazon.
Dummies Guide on How to set up the Extender with security turned on:
1. Completely ignore the instruction sheet that comes with the product. At first, I tried following it stubbornly despite reading these Amazon reviews, and I found that it is an embarrassment. Shame on you Belkin, for giving us so much unnecessary grief.
2. Find a computer in your home to use for this setup. Any computer (that isn't Vista) will do.
3. If this computer happens to be plugged into your router (I'm not talking about not the Extender), unplug it from the router. If this computer happens to have a wireless connection, disable the wireless connection.
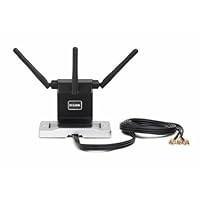
4. Plug in the power cord for the Extender into the wall, then connect an ethernet cord (looks like a fat telephone cord) into the back of the Extender, then stick the other end into your computer. The "LAN" light will now light up. Just in case you're concerned, you can ignore the red "search" light that may blink.
5. Install the "Belkin Range Extender Utility" onto this computer. The installation CD will place a program in your Start->Programs menu once you run the install.
6. Go to start->settings->network connections. At this point the only enabled network connection should be Local Area Network (or Local Connection... the name may differ slightly for you). If anything else is enabled, disable it. Right click Local Area Network and select Properties. You're now looking for a new window to pop up that lists a bunch of internet-sounding words like Network or QoS. Look for the item called Internet Protocol (TCP/IP). Double click that.
7. Select manual IP, and enter 192.168.2.100
8. The subnet mask will get filled out automatically. Ignore the gateway. Hit OK, you're finished.
9. Start up the Belkin utility, and hit "refresh" if nothing shows up on the list of detected Extenders. If you're lucky, you will see the Extender show up, and you can now click "Web Management".
10. If no items show up on the Belkin Utility's list, or an item does show up but the "web management" icon is unclickable, then repeat steps 6-9 but enter the IP address 192.168.1.100 instead. Then the Extender should show up.
11. Finally, once you are able to click "Web Management", it will bring you to a webpage that is very much like a Router setup page. The details of what you need to do here can be found in instructional docs on the web elsewhere. The basic idea is that you want to copy pretty much everything over to be identical to what your router settings are. The only exception is possibly the SSID of the Belkin Extender. Depending on your preference, you may want to choose a different name for it just so you can confirm that its really working later on.
12. Save those settings (there's a systems tab at the bottom of the web management panel that allows you to save the settings into a file as a backup).
13. Unplug the Extender from the computer, unplug the power for the Extender, and move the extender to wherever you want. Plug the power back in.
14. Go back to steps 6-9. Remove the manual IP configuration for your Local Area Connection, and revert the panels back to the way they were (which is probably "automatically obtain ip address"). Hit OK. Enable all your network connections if you disabled them in step 6.
15. You should now be able to use your wireless connection to see the Extender under its fresh new SSID. Enjoy.
A version of the above for those that are network-saavy:
1. Disconnect all wireless from your computer, then connect your computer directly to the Extender as if it were a router. Power up the Extender.
2. Manually specify your computer's IP address to be 192.168.2.xxx with subnet mask 255.255.255.0. Yes, I know this step is weird. I'll explain the reason for it in step#4.
3. Install the Belkin Network utility. Its a simple executable. Start it up. It's purpose is to scan for the Extender, provided that your Extender is directly wired to your computer (which we did in step 1).
4. You should see your Extender show up in the utility. If the Extender does not show up or the "Web Management" button is greyed out, this is because your computer and the Belkin Extender are on different subnets. The Belkin Extender is usually shipped from the warehouse hardwired to the IP Address 192.168.2.254. What??? When you plug your computer into the Extender, you need to hardwire your computer to be on the same subnet so the stupid utility will work. Hence, since the factory setting for the Extender is 192.168.2.254, hardwiring your computer's IP to 192.168.2.100 will get the utility to connect to the Extender. However, if for some awful reason your Extender is hardwired to some other IP Address (which is configurable once you get to step#5), you need to change your computer's IP Address to have a value that matches the Extender's new subnet. In other words, if the Extender IP somehow changes to 192.168.5.254, you should change your computer IP address to 192.168.5.100
5. Once you click "Web Management" you can configure the Extender via a browser window. Replicate your router's settings here (they all need to match the original router's, with the exception of the Extender's SSID).
6. Hit Save, then unplug the Extender's power cord and ethernet, and then move it to wherever you would like. Power it up again.
7. Remove your computer's manual IP address. You're now officially done.
*As a note, I had occasional connection problems when I had my Belkin router & extender encryption set to WPA-PSK. I just switched my encryption to WEP and now it is fine. Not everyone has this problem.
Up this review, if you found it useful. I want to see other people spared from the excessive pain the rest of us have already experienced!

Click Here to see more reviews about: Belkin F5D7132 Wireless-G Universal Range Extender

SHARES DATA & PERIPHERALS AS WELL AS A SINGLE INTERNET ACCOUNT AMONG ALL COMPUTERS CONNECTS TO THE NETWORK SWITCH & JOINS WIRELESS-EQUIPPED PCS TO A WIRED ACCESS POINT NETWORK INCREASES THE COVERAGE OF EXISTING WIRELESS NETWORK OF UP TO 1500 FT STANDARD 802.11G54 MB RAMLIMITED LIFETIME WARRANTY

Buy Now

Click here for more information about Belkin F5D7132 Wireless-G Universal Range Extender

Read More...

7/19/2012

NETGEAR WGXB102NA Wireless G Router Wall Pg Review

NETGEAR WGXB102NA Wireless G Router Wall Pg
Average Reviews:

(More customer reviews)
I use a wireless router in the house with great success. However, the range is pretty weak or my house is too big, and I am pretty sure it's not the latter. As a result, I researched a variety of solutions, none of which seemed too appealing to implement (bridges, wireless range extenders, new RF antenna, etc). It just all seemed too complicated, and I consider myself pretty tech savvy.
Fortunately, I was reading through some tech reviews and stumbled upon the Netgear Wireless wall-plugged router kit. It seemed like it was pretty simple to setup and easy to use. Well, I can report that it is exactly that.
There is no software to install at all. You simply plug in the ethernet cable from the cable modem in one room into the Netgear plug and then plug that into the wall. Check that all three green lights are lit and you are good to go.
The next step is to take the second half of the Netgear plug into the desired room in the house and plug it into an electric socket. When its three lights are lit, you have a connection and are good to go in there. My laptop computer picked up wireless signal immediately and I was surfing the web in no time flat. Basically, it was flawless.
So, WHY am I am only giving it four stars? Two reasons:
First, the wireless range of the Netgear plug is pretty weak. It definitely doesn't have the power of my main wireless modem. Then again, it doesn't have an antenna AND it still works, so it's no big deal; it's just not perfect.
Second, the Netgear plugs need to be plugged in somewhat near each other to function correctly and get the Homelink green light to turn green. When the Netgear plugs were plugged in on opposite ends of the house (what I was hoping for to maximize range), it did not achieve a homelink connection. However, when I moved the plugs to outlets that were closer together (but still outside my wireless routers range), it DID work. So, partial credit again here. While I cna't explain why it did not work, perhaps the electrical homelink signal degrades the farther the outlets are apart.
Anyway, everything is working pretty smoothly now and I am excited that I can get a signal in another area of the house that was not covered by internet previously.

Click Here to see more reviews about: NETGEAR WGXB102NA Wireless G Router Wall Pg

The NETGEAR WGXB102 Powerline Wireless Range Extender includes everything you need to provide wireless access to an existing network using only power outlets. You can now extend an internet connection to even the farthest reaches of your home without a tangled mess of cables.
Elegant Design and Simple to Install The WGXB102 is a kit that comes with two devices, the Wireless Range Extender (WGX102) and the Powerline Network Bridge (XE102).
The WGX102 is a small silver-colored box with rounded edges that has no wires or ports of any sort. Installation is truly plug and play: simply plug the device into the outlet and you have a wireless network originating from that spot.
The XE102 is a similarly shaped box that connects from an existing wired or wireless router to the power line. It then sends a network connection between connected NETGEAR Powerline devices. In addition to the included WGX102, other compatible devices include NETGEAR's XE104, XE103, XEPS103, and XE102, all sold separately.
Fast and Secure The WGX102 complies with both the Homeplug 1.0 and 802.11g wireless standards for compatibility with a wide range of devices. Since 802.11g is backwards compatible with 802.11b, you don't have to worry about your older devices that might not yet support the newer standard. The WGX102 supports 64-bit and 128-bit WEP encryption as well as WPA so you can be sure your data is safe from prying eyes. Additionally, it has VPN (IP-Sec and PPTP) passthrough, as well as the option to turn Wireless SSID broadcast on and off.
The NETGEAR WGXB102 Powerline Wireless Range Extender is backed by a 2-year warranty.
What's in the Box WGX102 wireless range extender, XE102 Powerline network bridge, ethernet cable, two setup CDs, installation guide, and warranty/support information card.

Buy Now

Click here for more information about NETGEAR WGXB102NA Wireless G Router Wall Pg

Read More...

7/17/2012

D-Link ANT24-0700 2.4 GHz Omni-Directional 7 dBi Indoor Antenna Review

D-Link  ANT24-0700 2.4 GHz Omni-Directional 7 dBi Indoor Antenna
Average Reviews:

(More customer reviews)
My wireless router is in my office in the basement. When I took my laptop to the first floor the signal strength was "Very Good" or "Good". When I first installed this antenna, it didn't make a difference and I was going to write it off, but I went through the instruction manual. The key to making this antenna work is the way you position it. For example if you keep the antenna vertical as you see in the picture on amazon, it transmits the signal in a horizontal circle. Like a dinner plate set on the dining table. If you are trying to send the signal to other rooms on the same level, this helps. However, it doesnt help if you are trying to send boost the signal to a level above or below the route. You need to position the antenna horizontally, (i.e, parallel to the floor) to send the signal in a vertical circle. My signal strength is now excellent to very good on the first floor and very good to good on the second level with the router in the basement. Hope this helps.

Click Here to see more reviews about: D-Link ANT24-0700 2.4 GHz Omni-Directional 7 dBi Indoor Antenna

The D-Link ANT24-0700 is a 7dBi High-Gain Omni-Directional Antenna designed to provide 360 of enhanced wireless signal coverage. For greater flexibility in placement, the ANT24-0700 is accompanied by a magnetic based with 1.5m extension cable. For any 2.4GHz wireless networking device with a SMA or TNC connector, the ANT24-0700 is the ideal solution to help increase wireless reception. Place the antenna in a prime location where maximum signal coverage can be attained.

Buy NowGet 25% OFF

Click here for more information about D-Link ANT24-0700 2.4 GHz Omni-Directional 7 dBi Indoor Antenna

Read More...

12/13/2011

D-Link ANT24-0230 Xtreme N 2.4GHZ Indoor Antenna Review

D-Link ANT24-0230 Xtreme N 2.4GHZ Indoor Antenna
Average Reviews:

(More customer reviews)
This antenna does work. It's all in the way you position it. It's design leaves a little to be desired but, if you position it just right, it works. I connected the antenna to my router, ran the cable under my scanner and up through the back so the antenna sits on top of the scanner. My signal went from "Low" and "Very Low" to "Very Good" on both my wireless N equipped PC and Laptop. Considering the router is on the other side of my apartment in my bedroom; some 60 feet away with a wall in between, it's great. I would recommend it.


Click Here to see more reviews about: D-Link ANT24-0230 Xtreme N 2.4GHZ Indoor Antenna


Buy NowGet 37% OFF

Click here for more information about D-Link ANT24-0230 Xtreme N 2.4GHZ Indoor Antenna

Read More...

11/20/2011

Hawking HiGain Directional Corner Antenna, indoor, 15dBi - HAI15SC Review

Hawking HiGain Directional Corner Antenna, indoor, 15dBi - HAI15SC
Average Reviews:

(More customer reviews)
This is a "deconstructive" review of Hawking's corner reflector. Basically I took it apart so you don't have to! BTW - I am an RF engineer, so I apologize if it gets too technical.
First let me provide a explanation of what a "corner reflector antenna" is. A corner reflector antenna is a very simple, but high gain type of antenna. It consists of a dipole antenna (a dipole is just a straight piece of wire cut in a precise way) and behind the dipole is an angled metal screen or plate which is called the reflector. The angle of the reflector is typically 90 degrees, which forms a corner and thus the name. The reflector focuses the signal so it is more concentrated, which results in higher gain versus a simple dipole.
Taking apart the corner reflector is straightforward, but it does take some time and muscle. I carefully but forcefully pulled on the gray plastic end caps. After some time, the end caps finally came off. This revealed an unlabeled, rather ordinary black "stick" antenna inside the white plastic pipe. It's probably a 5dBi collinear dipole. The antenna is connected to the coax cable via a panel mount SMA connector. I was able to remove this antenna, but it does take some torque because Hawking applied thread locking glue.
Based on it's construction, I have no reason to doubt the 15dbi gain claim. However, I seriously doubt the 90 degree vertical and horizontal beamwidths that the manual seems to claim. I guesstimate that 3dB beamwidths are in the order of 40 degrees horizontal and 30 degrees vertical, based on my experience with similar corner reflectors. This makes orientation MUCH more critical. If you are 15-20 degrees off, you could be losing half (3dB) of your signal! On the other hand, such a narrow beamwidth is a good thing if other people's AP's/client's are interfering. Any other transmitters outside of the main beam will be weakened, reducing your noise and improving signal quality.
Now to analyze the coax cable. The outer jacket is unlabeled white plastic, so you can't tell who made it or what type of cable it is. It's thin, about 1/8" thick . I cut off one end to see what's inside. The shielding is quite good. It's a dual shield, foil plus braid. The foil provides complete coverage. The braid is tin plated copper and has excellent coverage, probably 95%. The center conductor looks and cuts like pure solid copper, not copper clad steel. The center insulator (the dielectric) is a clear translucent, solid (not foam) plastic. When I soldered on an SMA pin, the dielectric easily melted! It's probably NOT teflon, but cheaper, higher loss polyethylene. Based on this, it's probably a RG-174 type cable, not the lower loss RG-316. Cables of this type generally have a loss of 0.6dB per foot at 2.4Ghz. The cable is 6 feet long , so you lose more than half (3.6dB) of your signal in the coax! Making a shorter cable and/or using better cable would help.
Considering how it's made, a lot of the negative reviews make sense. It's a 15dBi antenna, but you lose 3.6dBi in the cable so effectively it's only 11.4dBi. Plus if you don't point it within 15 to 20 degrees of your target (both horizontally AND vertically), you will lose even more signal. Used indoors, there is so much RF scatter that the actual direction of maximum signal can very often NOT be in the direction of the target due to signals being bounced around. You'll have to rotate the antenna in different directions vertically and horizontally to find the maximum signal. Used outdoors or in unobstructed area, just point it at the target and you're done. However, keep in mind that this IS NOT a weatherproof antenna, so don't leave out outside where the rain and sun will beat down on it.
Used properly, this antenna really shines. It provides a tremendous value for under $50. Antennas with similar gain will cost MUCH more.

Click Here to see more reviews about: Hawking HiGain Directional Corner Antenna, indoor, 15dBi - HAI15SC

Increase Your Wireless Network Strength, Works with 2.4GHz 802.11b /g Wireless Standards, Extend your Network Range, Great for Large Conference Rooms or Open Spaces, East Installation (No Software Required).Main FeaturesManufacturer: Hawking Technologies, IncManufacturer Part Number: HAI15SCManufacturer Website Address: www.hawkingtech Product Type: High-Gain AntennaFrequency: 2.4 GHzGain: 15 dBiImpedance: 50 ohm NominalConnectors: 1 x Reverse SMAStandard Warranty: 1 Year(s)

Buy NowGet 22% OFF

Click here for more information about Hawking HiGain Directional Corner Antenna, indoor, 15dBi - HAI15SC

Read More...

11/19/2011

eForCity Wi-Fi Booster Antenna for D-link DWL520, Linksys WMP11, WET11, Netgear MA311, or D-link Aps, 2400-2483 MHz, 6ft Review

eForCity Wi-Fi Booster Antenna for D-link DWL520, Linksys WMP11, WET11, Netgear MA311, or D-link Aps, 2400-2483 MHz, 6ft
Average Reviews:

(More customer reviews)
At first, I wasn't sure if I liked this little antenna or not. There isn't much to it... it's got a connector, a cord, a magnetic base (which is pretty strong by the way) and of course the antenna itself. It didn't seem to give me much of an improvement until I learned how to pick the correct location for it...
The biggest benefit of having one of these is flexibility of placement. With antennas, correct placement is crucial. I bought two: one for my desktop PC and one for my router. These antennas aren't necessarily any more sensitive than the little plastic ones that come with wifi cards and access points, but being able to move the antenna location from behind the PC on the floor (which is where most people with wireless cards have their antennas) to the top of your desk or on top of your monitor makes a big difference right away.
Now, if you are really serious about getting the best performance out of this antenna, I would suggest you download a program called NetStumbler. It will let you see the S/N ratio in dBm and it updates in real-time. This lets you get perfect placement with your antenna. You'd be amazed what a difference an inch to the left or right can make. I have a feeling a lot of people who have problems with aftermarket wifi antennas are not placing them properly.
For $5.54 each plus a couple bucks for shipping, this antenna can't be beat.

Click Here to see more reviews about: eForCity Wi-Fi Booster Antenna for D-link DWL520, Linksys WMP11, WET11, Netgear MA311, or D-link Aps, 2400-2483 MHz, 6ft


Buy Now

Click here for more information about eForCity Wi-Fi Booster Antenna for D-link DWL520, Linksys WMP11, WET11, Netgear MA311, or D-link Aps, 2400-2483 MHz, 6ft

Read More...

9/09/2011

Cisco-Linksys WRE54G Wireless-G Range Expander - REFURBISHED Review

Cisco-Linksys WRE54G Wireless-G Range Expander - REFURBISHED
Average Reviews:

(More customer reviews)
There was a lot of information out there about this product but I decided for $25 (Refurbished) I'd try it. Plugged it in, hit the "auto" button and away it went. It boosted the signal in an outbuilding from "Low" to "Excellent" and seems to be working just fine. I ignored the directions and the CD that came with it and didn't do any of the techno stuff like configuring the Host name, etc, etc. It just worked!

Click Here to see more reviews about: Cisco-Linksys WRE54G Wireless-G Range Expander - REFURBISHED


Buy Now

Click here for more information about Cisco-Linksys WRE54G Wireless-G Range Expander - REFURBISHED

Read More...